Quality Control & Analytical Inspection
The quality process at INSCO begins as the responsibility of every machine operator. When a drawing is released by Engineering for manufacture, the first print goes to our chief inspector. It is his responsibility to highlight each dimension, tolerance and call-out to indicate whether 100% inspection, or an appropriate AQL sampling of that characteristic, is necessary. Inspection Travelers then record, by gear serial number, the actual measurements obtained in each operation, thereby assuring documented compliance with the drawing's requirements.
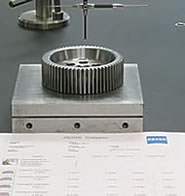 Most of our ground gears are further documented with printouts of our analytical inspection results. Four M&M gear analysis systems compare actual gear tooth parameters to computer models within repeatable accuracy of one micron. Index, involute profile, and lead normally suffice to define the geometrical quality of a gear. However, additional measurements, including tooth thickness, worm lead per convolution, or tooth surface topography, are readily available. If required, the document package that accompanies our shipment can also include heat-treat certification, material analysis, dynamic balance results, "red line" charts of gears inspected with master gears, or other requirements of MIL Standards or similar specifications.
For permanent traceability, our gears can be stamped with part numbers, serial numbers, measurement over wires, and purchase order numbers. Even SPC requirements, when called for, can be accommodated with a custom program developed for use with our M&M analyzer systems.
Analytical Inspection
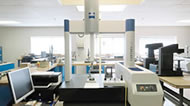 Inspection is a critical and fully integral component of all our design and production processes. In addition to our in-house inspection capabilities, we also offer contract analytical gear inspection service through our fully equipped, environmentally controlled laboratory. Our inspection service provides a complete set of documentation defining all attributes of gear composition quality levels.
M&M Gear Analyzers
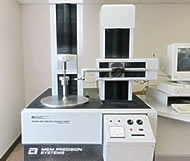 Our inspection lab contains four M&M gear analyzers that measure four additional critical features that many of our competitors’ inspection methods do not provide. We have the ability to analyze gear features to within a 10 thousandths of an inch allowing us to determine if the gear or gear set has been made to exact dimensional specifications. We also have the ability to expose problems within a mechanical system by analyzing gear data produced by our analyzers. In many cases we can recommend changes to your system to solve problems or improve performance based on our analysis.
Validation of AGMA and DIN Quality Standards
Our gear analyzers provide definitive proof that our gears meet all established criteria that comprise the graduated quality systems. We are capable of inspecting to both AGMA and European DIN standards. You can be confident that your gears are made to your exact specifications every time delivering consistent products exactly tailored to the 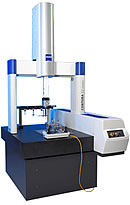 requirements of your mechanical systems
Zeiss CMM
Our coordinate measurement machines establish the precision necessary to produce the highest quality levels for gears and related assemblies. The foundation of producing high quality gearing starts with high quality gear blanks. The name Carl Zeiss is globally synonymous with quality and is widely recognized as the industry leader in precision measurement.
Our gear blanks are inspected to the same high standards as our finished gear products. We also ensure that third party products, produced for our gear assembly area, meet the same high standards. Whether it is a gear blank, or complex casting for the assembly area, our attention to detail assures you the highest quality product on a consistent basis.
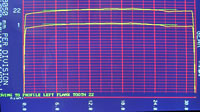 Electronic Results Storage and Printed Documentation
We store our (gear) inspection results electronically for future requirements and can supply printed inspection documentation as needed. Online storage of inspection results provides immediate access to this critical data whenever required.
SPC Capabilities & Computer Data Collection
Our high-volume manufacturing cells are equipped with statistic process control capabilities. Each cell is outfitted with a Unite-A-Matic gear inspection data-collection system capable of connecting with in-line PC and network storage and analysis.
 We have the proven ability to control process though SPC methods along with on-line capability to communicate information with our engineers. Because any process or inspection requirement can be controlled through statistical means, we have a high level control over the process and can consistently deliver highest quality products.


